Training is the most important part of your onboarding process, so why not make it an enjoyable experience? Embedding presentations into your training modules can be a great way to make training more engaging. It’s also more consistent (each new employee gets the same information and delivery) and time saving (you don’t have to interrupt your schedule to deliver the same introductory training every time a new person joins your team). Everybody wins.
The benefits don’t stop there, either. Embedding presentations and other media can enhance your training materials by:
- increasing engagement – using visuals and other techniques to keep the content interesting (and who wants to sit and read walls of text for hours on end?)
- improving comprehension – by using different approaches to the material to accommodate different learning styles
- increasing retention – with engaging, relatable examples that connect the material to real situations your team will encounter on the job.
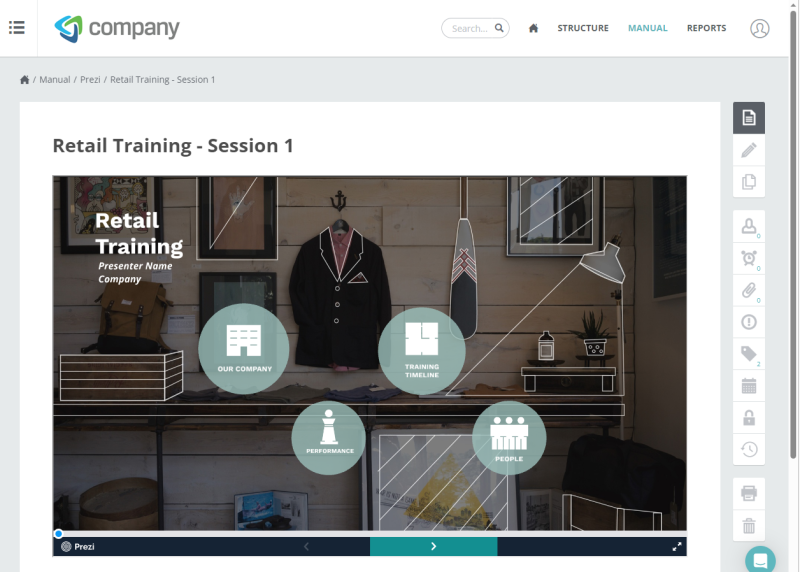
You can easily embed presentations into the instruction panel of your Activated Checklists, policies and procedures in Way We Do. All you need is an embed code to make your training pop. Check out Way We Do’s knowledge base for instructions (and you can always reach out to support@waywedo.com if you need extra help or advice).
Our favorite tools for creating and embedding presentations
Now you know about embedding presentations in Way We Do (and you’ve had a look at how), let’s take a look at some of the platforms you can use to make the presentations you want.
- Prezi is an excellent choice if you want a non-linear, more impressive style. It offers unique layout tools that are perfect for breaking down larger concepts into component parts.
- SlideShare has tons of user-made presentations you can embed into your own training materials. It can help you save time while still making an impact.
- Google Slides is a solid option for creating group presentations, as it lets everyone collaborate on developing presentations. As an added bonus, it comes with Google Images built in, so it’s easy to quickly find relevant photos.
- Canva is a great tool to use if you want to add eye-catching visuals quickly and easily. The platform offers icons, illustrations and other graphics, as well as templates for a range of applications. Canva also lets you collaborate with others on developing presentations.
- PowerPoint is still a strong contender in this space, with cool animations and transitions. It also includes a range of visually appealing templates, and design and layout suggestions.
- Microsoft’s Sway makes the design process easier by organising your ideas for you. It offers multiple design flow options to help you organise your presentations and give them the pizzazz they deserve.

Tips for creating a compelling training presentation
Keep it fresh: The information content isn’t the only thing you need to keep updated. It’s equally important to make sure your presentation layouts and designs are contemporary and reflect your current brand identity.
Keep it simple: Over-designing something is definitely a thing. Simplicity is elegance, so make sure the visuals and effects you use enhance the topic, rather than distract from it; keep your colour palette clean and simple; stick to a single style or theme of imagery (including gifs) where you can. Together, these principles will make your presentations look coordinated and professional.
Make it high quality: Choose images with an appropriate level of resolution for your platform, and make sure they’re clear and relevant to the topic. Keep font sizes reasonable. For example, if you’re creating a presentation you’ll be delivering to a large audience, will those at the back of the room be able to read the content easily?) Minimise the amount of text you include on each slide; if you can’t avoid detailed information, try splitting it across multiple slides to make each point easier for your audience to take in.
Test it before release: Once you’ve finished your presentation, go through it yourself as if you were someone taking the training. You may want to ask a colleague to do the same. Make sure everything works the way you want it to and take notes about what you need to tweak. You may want to ask a colleague to do the same as well. Get their feedback as an ‘objective outside’ source – we all know we can get blind spots when we’ve been working on a project like this – and make any further adjustments you think it needs.
Ready, set…
Congratulations! You’ve now got a presentation ready to embed in your training materials. Remember to check in with your team members to see how they feel about the new approach, and maybe even quiz them to see how much more knowledge they’ve retained as a result.